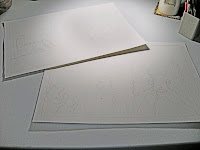
 First, I get my supplies together for this step. I like to use a #2 pencil since its soft enough to draw without scratching the paper surface but not so soft that its dark and difficult to erase. Sometimes I use a mechanical-style pencil, only because I get annoyed at having to constantly sharpen. But whatever pencil type or brand an artist wants or likes to use is fine. When I do have to sharpen I use an electric pencil sharpener and/or a very good hand sharpener to get the right amount of point. My favorite paper is a very good quality Strathmore cold press watercolor stock since I love the texture and it is a good workable weight (140 lbs.). I try to buy it in a block if I can which means the sheets are bound with adhesive instead of a ring binding. And because all artists have to deal with “renovations” (not mistakes!), I love Staedler erasers the best, and I always have a clickable one ready which is great for tiny erasing jobs. I use a kneaded eraser once in a while, too, which looks a little bit like silly putty. I’ll also be using some masking tape later on, so add that to the list of supplies, too.
My trick to getting the drawings ready is to cut a piece of cardboard to the spread size, which in my case is 17.5 x 11.5 (The book will be 8.5 x 11 inches when closed, there is usually about 1/4 inch bleed edge for printing.). Then I trace the cardboard and mark the center for a page gutter reference (where the book’s fold will be). Then I measure about an inch all around and trim off excess paper to make the sheets easier to handle and digitally scan later.
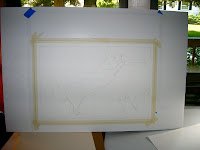
 I also like to tape the papers to boards right away since I prefer to draw with the boards titled sometimes as opposed to flat on a table (taping will also be important later in the painting process). I use whatever I have for boards: masonite drawing boards, foam core boards, heavy cardboard...
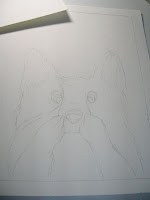
Then the drawing starts. I use photos and my sketches to help me draw exactly what will work, and I have to make sure I am leaving space for text. I draw very lightly with my pencil at first to make sure things are in the right place, then I darken the composition a bit when I’ve got what I want. I try to make sure the composition and images capture what I had in mind in my sketch even if it is not exact. This is the best time to make changes to the drawings, so if something doesn’t seem to work the way I want it to, I need to figure it out now!!
When getting started on a really important stage of my art, I remind myself to be fearless. A blank piece of paper can play mind tricks on you, so you just have to dive in and do it. I also find that if I am not focused or able to concentrate I can spend a long time on art work only to have it come out not so fabulous or I even might make some serious mistakes. I make sure I take frequent breaks and if my head isn’t in it, I might as well put it aside and go back to it later. One hour of excellent focus is better than eight hours of distracted frustration.
So with my pencil drawings complete, I’m ready to start adding color! More on that in another blog post coming soon...

No comments:
Post a Comment