Monday, July 16, 2012

Getting Inspired: A Day on the Island

Right now it is sticky hot and I am taking a break from drawing to do a little blogging because its too hot to do just about anything else!

I was thrilled last week to spend a wonderful day with Kathy and Sandy, the authors of my summer book project, The Hibernating House! The story is about a summer cottage near the ocean in a little seaside town (what a perfect summer project, right?). I am very lucky to live in a little seaside town myself which can give me some inspiration for my illustrations, but we also happen to live really close (under an hour by ferry) to one of the most beautiful islands in the Northeast, Martha’s Vineyard. So here’s a little peek at my lovely day on the Vineyard with Kathy and Sandy through pictures...

This seagull perched itself right at the top if the ferry, ready to sail. We set out from Falmouth, MA.
A view of MV from the Woods Hole Ferry as Kathy and I sail into Oak Bluffs. One of our inspiration houses is right in this area.


The ferry dock is unloading, and Sandy is waiting for Kathy and me to take us around the island!
Sandy's in the red shirt, waiting on the dock to take us around the island!
One of our first stops, the jetty rocks that will appear in the book.
We drove though some beautiful beach areas along the road, including this famous bridge from the scene in JAWS!!
We arrived at "Easy Breezy" the main inspiration house for the book! It is even more charming than I had imagined!
We sat on the porch, had some snacks, and looked at some of the sketches for the book. What a tough job!!

I met some of Sandy's family including Finnegan who just might find himself in the pages of the book!


The tour continued through beautiful Edgartown...
The 4th of July parade route through Edgartown, still festive!


We watched the shortest ferry ride ever to Chappaquiddick....
And we visited a pretty farm stand...
... and then found our way back into Oak Bluffs to see the famous campground gingerbread cottages... I love this front porch!!
Like walking through a fairy tale...
Then around the park...
... and to the carousel...
After a yummy late lunch it was time to catch the ferry back. What a beautiful day!
Here we are on the front porch, Kathy in blue, Sandy in red, and me with my sketch book.

Now, how could anyone not be inspired by all of that? Time to get back to my drawing!

Tuesday, July 10, 2012

Give Me Erasers or Give Me Death

Eraser or no eraser? That is the question.

You can’t ignore this issue when discussing the art pencil (see my blog entry about pencils!). Many people are really bothered by the fact that there is often NOT an eraser at the end of most art pencils. But there is a good reason why: FREEDOM!

Don’t you want the right to choose your eraser? It should be in the Constitution!

Erasers are left off of many art pencils since often artists like to choose a specific eraser depending on the type of art work being made or just for personal eraser preferences.

But artists didn’t always have erasing choices! The first rubber eraser dates back to about 1770. Before that, artists used rough pumice-types stones (ouch) or small pieces of bread. No wonder artists were “starving”!! The bread actually does work but make sure it doesn’t have chocolate chips or kalamata olives in it (delicious, but bad for art work).

Now let’s look at some types of erasers you can buy and try:

• Classic “Pink” Rubber Eraser:
This is what you’ll find on many basic #2 pencils. Rubber erasers can work just fine, but sometimes leave a pink smear. They are also very abrasive on fine paper and can create a lot of dust. The good thing: sometimes you need some seriously harsh erasing, especially if the pencil is pressed really hard into the paper.  The best thing: they are probably the least expensive. So if this does the trick, go for it.

• Plastic (Vinyl) Erasers:
A vinyl eraser in a pencil-like plastic holder
These are fantastic because they are usually white so you won’t have a problem with color smears on paper (though you can get them in funky colors if you wish). They are soft enough to be gentle on paper, abrasive enough to thoroughly clean. They do leave some dust behind. I like the ones that come in a holder that looks like a pencil since it makes it easy to erase small areas. These are often the kind used on mechanical pencils, too. I have actually been able to remove pen/marker smudges with this type of eraser which has saved many an art work around my classroom.

• Gum Erasers:
These are crumbly and are fairly soft compared with pink and plastic. They leave a lot of crumbly pieces behind, but are good at getting into crevices in rougher papers (like watercolor stock) without destroying the texture of the paper. They can be used to safely erase on the most delicate papers, too. I also find that these work well to erase chalks and pastels and they can remove some types of dried glue.

• Kneaded (or clay) Erasers:

These are like Silly Putty. You can form them into different sizes and shapes. They can lift off a small amount of pencil as well as completely clean. This is a great eraser when used to “draw” light areas within pencil shading and works particularly well with charcoal drawing. There is NO dust at all from this kind. You can clean a kneaded eraser by... guess what?... Kneading it. Surprise. Warning to teachers: From experience (ahem), middle school kids love to rip pieces off and chuck them at each other. It’s also not too nice to have these stuck in the soles of your shoes. So I save these for the pros.

Plastic, gum and kneaded erasers are more expensive than rubber erasers, and pricing depends on the brand (my favorite is Staedtler but there are many good ones out there). So, try them all-- I have all the types in my studio since you never know what you might need on your next project.

Saturday, July 7, 2012

Choose Your Weapon: The PENCIL!

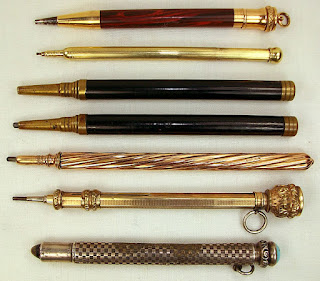
Look at these fancy antique mechanical pencils!
So as I’m working on my summer book project), I’m reminded about something my students ask me about a lot: how do you choose your PENCIL??

Well, as most of you know, artists rely on your good old-fashioned pencil for a lot of different art processes, even if its just for sketches or practice. What many people probably don’t realize is that the pencil as we know it was only invented around 1600, so for many thousands of years artists had to go without that handy tool. Before that artists used natural materials such as chalk, charcoal, sepia, or etching with sharp pointed tools to draw fine lines and sketches. It wasn’t until the late 1800’s that the pencil with an eraser on the end of the wooden shaft was designed and produced.

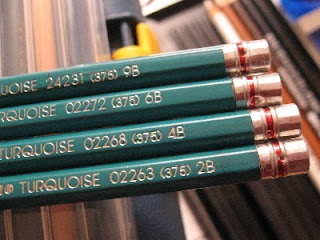
These are some of the more popular numbers used for drawing.
Today, pencils are made with a mix of graphite and clay that controls the hardness of the material. Pencil hardness ranges from 9H (hardest) to 9B (softest). The softer the pencil, the darker and more smudgy your lines will be. Your standard writing/testing pencil, as my students should well know, is a 2B. By the way, pencils never contained actual lead inside, even though some artists’ paints have been known to contain lead. Lead hasn’t been used as a drawing material since Ancient Roman times.

Today, 14 billion pencils are made each year worldwide!! At least half of those are used in my art room (haha!). So, how does an artist choose the right pencil?

An artist should test many brands and types. There is not one type of pencil that works for everything. For example, I would not want a smudgy dark line for very architectural types of drawings. I would probably choose something in the H range or even a mechanical pencil with very skinny sized “lead”. If I were sketching a landscape or something that needed deep shading or textural effects, I’d probably use a very soft pencil (my favorite is the Ebony pencil that is somewhere softer than 6B depending on the brand). But I do I like a softer/thicker mechanical pencil if I am sketching outdoors or somewhere I can’t easily sharpen my pencil.

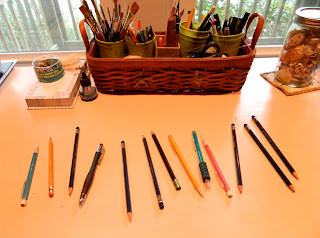
Ooooo look at all of my pencils!
Don’t forget, the type of paper you are drawing on may effect how the pencil performs as well. And if you want to paint or add color to the drawing, very smudgy pencil can smear or make your colors muddy, so you’d want to use something that works well with your other media. I’d test the paper and media with the pencil before starting, or if you are a more experimental artist, just try it and see what happens.

Now, eraser or no eraser? That is the question. But that is for a later blog because erasers are a whole other beast! Until then, try out some pencils and find the ones that work for you and your art.

Tuesday, July 3, 2012

Artist at Work!

For me, summer means vacation and work at the same time. This summer, the Floyd series is on hold while I work on a different and new project (The next Floyd book, "Floyd and the Sparkling Seashell" is still in the works! Stay tuned!). My summer 2012 project is "The Hibernating House" by Kathy Tarentino and Sandy Leahy, and I am in the process of working on the house imagery and preliminary sketches.

This photo shows what my work area usually looks like at this stage. Sometimes I work in my sunny kitchen, sometimes in my studio room at the front of my house.

Artist at Work: Today, setting up my inspiration board, gear and sketchbook in the kitchen.
First, I like to assemble an inspiration board with the reference photos I will use most often. I simply attach the photos with double sided-tape and then I can keep the board nearby rather than have to flip through multiple pages of photos.

I use thumbnail-type sketches at this point, which means I draw a small box or multiple boxes on the sheet of sketch paper rather than using the entire page. This allows me some space to put notes along the perimeter of the drawing. Later, I will be gluing the printed-out text for each spread below its thumbnail sketch for easy reference.

I like to use a large spiral-bound sketchbook for this stage. It keeps all of my drawings together in order. This type of sketchbook can open up and lay completely flat, which is good for working as well as for digitally scanning the pages if I need to do that.

I also make sure I get a book with very thick drawing paper pages, not newsprint. The more expensive paper/sketchbook is worth the money.  Because it's much thicker and whiter than newsprint, it is a million times better for scanning or if I want to paint or test colors and, most importantly, I can erase a lot without tearing the paper.

There is a lot of linear work needed for drawings that have architecture involved. I like to use a clear plastic ruler so I can see through the ruler when doing closely-placed line work.

With all of my gear, I am ready to get to work!
Stay tuned for updates on my summer project...